Choco-Orange Dream Cake Cups
Highlighted under: Sweet Kitchen
When I first combined rich chocolate and bright orange zest, it was a match made in dessert heaven. These Choco-Orange Dream Cake Cups became an instant favorite in my household, captivating everyone with their delightful balance of flavors. I love serving them at gatherings because they look stunning and are simple to make. With layers of chocolate cake and luscious orange cream, each bite is filled with surprises. You're going to fall in love with this easy-to-follow recipe that is sure to impress your guests!
Creating the perfect blend of chocolate and orange was a delightful challenge. I experimented with different ratios and found that adding fresh zest to the creamy frosting brought out the natural brightness of the orange, balancing beautifully with the chocolate. My family couldn't get enough!
Another key to success was using quality chocolate for the cake. I used a dark chocolate that not only boosts the flavors but also adds a rich texture to the layers. Baking the cupcakes a day in advance allows the flavors to meld, enhancing the overall experience.
Why You'll Love This Recipe
- Rich chocolate flavor paired with fresh orange zest
- Creamy texture that melts in your mouth
- Perfect for celebrations or as a sweet indulgence
Delicious Layers of Flavor
The combination of chocolate and orange in these cake cups creates a uniquely rich and refreshing experience. The chocolate cake base is deeply flavorful due to the use of unsweetened cocoa powder, which gives the cake its intense chocolate color and taste. Make sure to mix the batter just until combined; overmixing can create tough cakes. By incorporating boiling water at the end, you activate the cocoa fully, ensuring a moist and decadent final product that melts in your mouth.
The orange cream adds a vibrant twist to the rich flavors of the chocolate. The zest of the orange infuses the cream with essential oils that provide a fragrant aroma and tangy brightness. When whipping the heavy cream, it's crucial to start with a chilled bowl and cream to achieve the perfect stiff peaks. This ensures that the cream holds its shape well when you pipe it into the cake cups. Avoid overwhipping, as this can lead to a grainy texture and risk turning your cream into butter.
Tips for Assembly and Presentation
Carefully cutting the tops off the cooled chocolate cupcakes is essential for creating a balanced cake cup. I recommend using a serrated knife for a clean cut to prevent crumbling. When hollowing out the center, be gentle to avoid breaking the delicate edges of the cupcake. This hollowed-out space is where the orange cream will shine, so aim for a generous scoop while leaving enough cake on the sides for structural integrity.
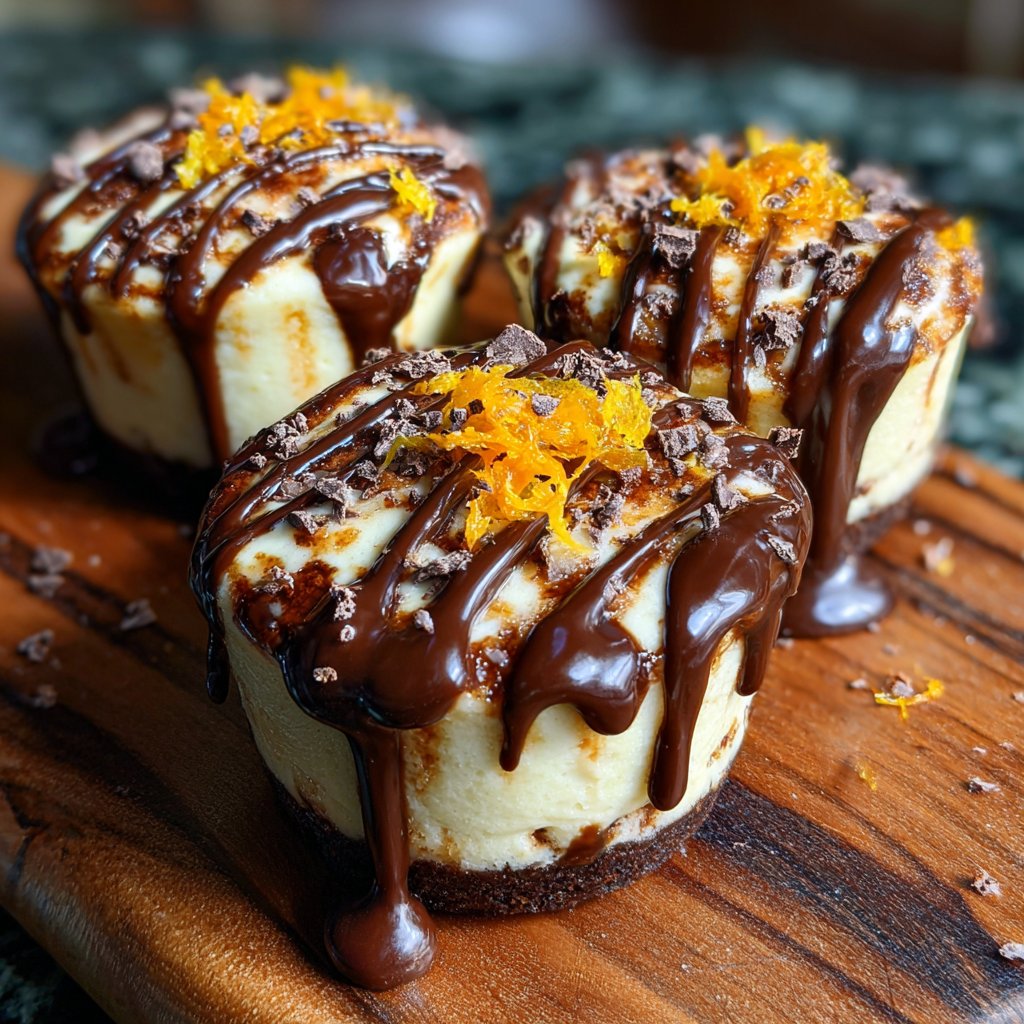
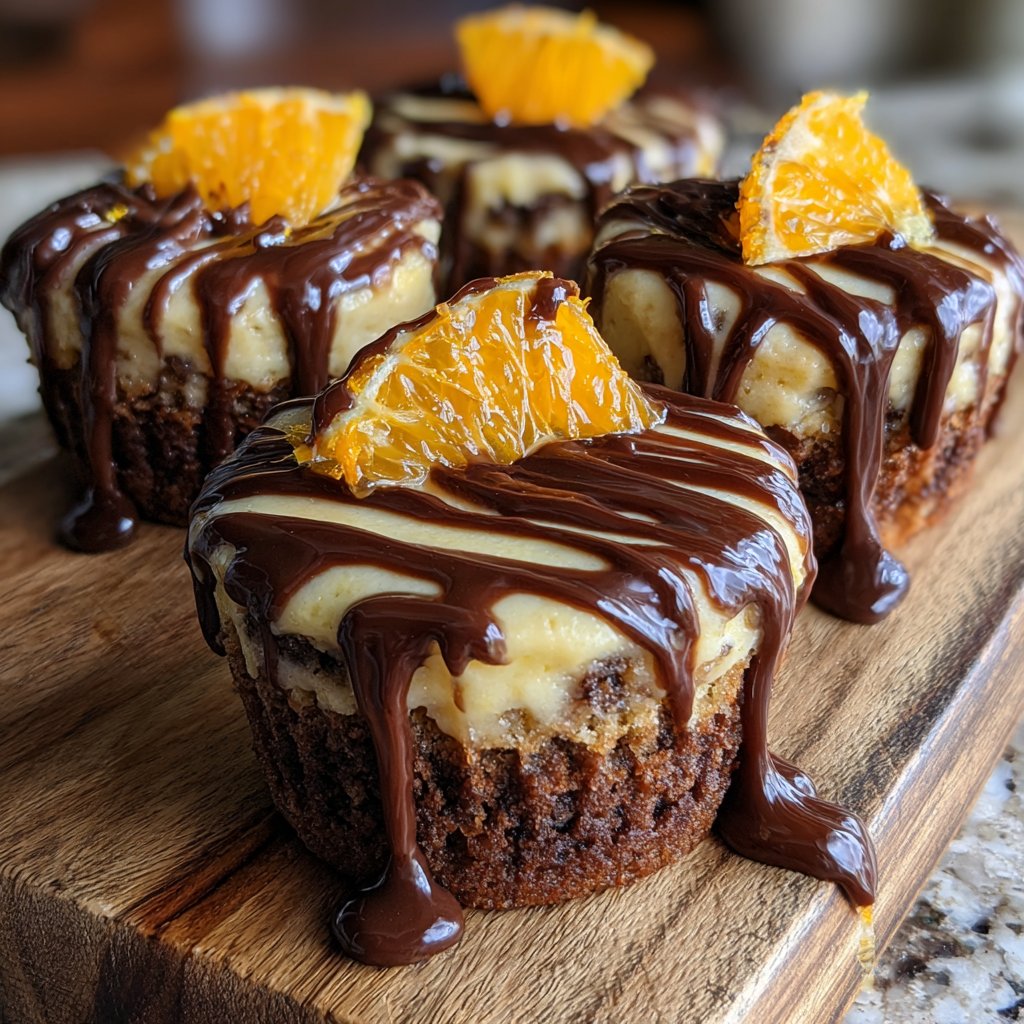
For an eye-catching presentation, try garnishing your Choco-Orange Dream Cake Cups with additional orange zest or even thin slices of orange. This will not only enhance the visual appeal but also reinforce the orange flavor. If you're preparing for a special event, consider arranging the cake cups on a tiered cake stand for an elegant touch that’s sure to delight your guests.
Storage and Make-Ahead Options
If you want to get a head start on this special treat, you can bake the chocolate cupcakes a day in advance. Once they are completely cooled, store them in an airtight container at room temperature to maintain moisture. However, do not fill them with orange cream until just before serving. Filled cupcakes are best enjoyed fresh, as the cream can soften the cake over time and may lead to a soggy texture.
Should you have any leftovers, store the assembled cake cups in the refrigerator, where they can last for up to two days. To avoid compromising their texture, I recommend covering them loosely with plastic wrap rather than sealing them tightly. If you're in a pinch for time, you can also prep the orange cream ahead of time and store it in an airtight container in the fridge for up to 24 hours, allowing you to quickly assemble your cake cups before your guests arrive.
Ingredients
To whip up these delightful treats, gather the following ingredients:
For the Chocolate Cake
- 1 cup all-purpose flour
- 1 cup sugar
- 1/2 cup unsweetened cocoa powder
- 1 tsp baking powder
- 1/2 tsp baking soda
- 1/4 tsp salt
- 1/2 cup buttermilk
- 1/2 cup vegetable oil
- 2 large eggs
- 1 tsp vanilla extract
- 1/2 cup boiling water
For the Orange Cream
- 1 cup heavy whipping cream
- 1/2 cup powdered sugar
- Zest of 1 orange
- 2 tbsp fresh orange juice
Now that your ingredients are ready, let’s move on to the steps!
Instructions
Follow these steps to create your Choco-Orange Dream Cake Cups:
Make the Chocolate Cake
Preheat your oven to 350°F (175°C). In a large mixing bowl, combine flour, sugar, cocoa powder, baking powder, baking soda, and salt. In another bowl, mix buttermilk, vegetable oil, eggs, and vanilla. Gradually add this mixture to the dry ingredients, stirring until just combined. Finally, stir in boiling water. Pour the batter into lined cupcake tins and bake for 18-20 minutes. Let cool completely.
Prepare the Orange Cream
In a chilled bowl, whip heavy cream until soft peaks form. Gradually add in the powdered sugar, orange zest, and orange juice. Whip until stiff peaks form. Be careful not to overmix.
Assemble the Cake Cups
Once the chocolate cakes are cooled, cut the tops off to create a flat surface. Hollow out a small portion of the cupcake center. Fill the hollow with the orange cream and replace the tops. Decorate with additional orange zest if desired.
Your Choco-Orange Dream Cake Cups are now ready to serve! Enjoy the delightful combination of flavors.
Pro Tips
- For an even more intense orange flavor, incorporate orange extract into the cream. Also, consider chilling the cake cups for an hour before serving to enhance the flavors.
Ingredient Substitutions
If you're looking to modify the chocolate cake for dietary preferences, you can replace all-purpose flour with a gluten-free blend that measures cup-for-cup. Additionally, for a dairy-free option, try substituting buttermilk with almond milk mixed with a teaspoon of vinegar or lemon juice, or use a dairy-free yogurt. These modifications still allow you to enjoy a rich cake without compromising on flavor or texture.
For a lighter cream filling, consider using mascarpone cheese combined with whipped cream for a less airy and richer texture. Adding a splash of Grand Marnier or another orange liqueur to the orange cream can also enhance the flavor profile, making the cake cups feel even more sophisticated and special, perfect for adult gatherings.
Troubleshooting Common Issues
One common issue when making rich chocolate cakes is ensuring they bake evenly. Investing in good quality cupcake tins and using an oven thermometer to check your oven's accuracy can greatly improve your baking outcomes. If the cakes dome too much, reducing the baking time by a minute or two and checking doneness with a toothpick can help create a flatter surface, ideal for filling with cream.
If your whipped cream doesn't reach stiff peaks, make sure you haven't added the sugar too quickly and that the cream bowl is sufficiently cold. A light sprinkle of cornstarch can stabilize the whipped cream if you find it beginning to separate. This is a great trick to keep your orange cream firm, especially if you're preparing it in advance for a gathering.
Questions About Recipes
→ Can I make the chocolate cake in advance?
Absolutely! You can bake the cakes a day ahead and store them in an airtight container.
→ What can I substitute for buttermilk?
You can mix 1/2 cup of milk with 1/2 tablespoon of vinegar or lemon juice to create a buttermilk substitute.
→ How do I store leftover cake cups?
Store them in the refrigerator in an airtight container for up to 3 days.
→ Can I use orange extract instead of zest?
Yes, you can use orange extract, but fresh zest gives a more vibrant flavor.
Choco-Orange Dream Cake Cups
Created by: The Chefblakeresipes Team
Recipe Type: Sweet Kitchen
Skill Level: Intermediate
Final Quantity: 12 cups
What You'll Need
For the Chocolate Cake
- 1 cup all-purpose flour
- 1 cup sugar
- 1/2 cup unsweetened cocoa powder
- 1 tsp baking powder
- 1/2 tsp baking soda
- 1/4 tsp salt
- 1/2 cup buttermilk
- 1/2 cup vegetable oil
- 2 large eggs
- 1 tsp vanilla extract
- 1/2 cup boiling water
For the Orange Cream
- 1 cup heavy whipping cream
- 1/2 cup powdered sugar
- Zest of 1 orange
- 2 tbsp fresh orange juice
How-To Steps
Preheat your oven to 350°F (175°C). In a large mixing bowl, combine flour, sugar, cocoa powder, baking powder, baking soda, and salt. In another bowl, mix buttermilk, vegetable oil, eggs, and vanilla. Gradually add this mixture to the dry ingredients, stirring until just combined. Finally, stir in boiling water. Pour the batter into lined cupcake tins and bake for 18-20 minutes. Let cool completely.
In a chilled bowl, whip heavy cream until soft peaks form. Gradually add in the powdered sugar, orange zest, and orange juice. Whip until stiff peaks form. Be careful not to overmix.
Once the chocolate cakes are cooled, cut the tops off to create a flat surface. Hollow out a small portion of the cupcake center. Fill the hollow with the orange cream and replace the tops. Decorate with additional orange zest if desired.
Extra Tips
- For an even more intense orange flavor, incorporate orange extract into the cream. Also, consider chilling the cake cups for an hour before serving to enhance the flavors.
Nutritional Breakdown (Per Serving)
- Calories: 380 kcal
- Total Fat: 26g
- Saturated Fat: 15g
- Cholesterol: 195mg
- Sodium: 85mg
- Total Carbohydrates: 32g
- Dietary Fiber: 3g
- Sugars: 24g
- Protein: 6g